
* * * * * *
Disclaimer – I am NOT a professional – I’m a hobbiest – I’ve only been embroidering since December of 2013 – I found there is so little out there to help us learn how to complete an embroidery project from beginning to end, I thought I’d try to take some photos of the steps that I do in hopes that it might help someone else in the learning process. This may not be the “right” way, but it works for me.
* * * * * *
This tutorial is dedicated to learning techniques to machine applique using cut files cut with a Silhouette Portrait cutting machine (though you can hand trim your applique pieces if you don’t have a Silhouette machine). Designs by Juju recently came out with this gorgeous new Embossed Easter Egg Monogram. I have several of their other seasonal embossed designs, so I knew this would be a good quality product also. You can find the design I used for sale here: http://www.designsbyjuju.com/embossed-easter-egg-monogram-alphabet. I usually purchase most of my bath towels (terry/fluffy) at T. J. Maxx, but this particular towel came from Tuesday Morning because I needed a quick white towel and Tuesday Morning is local for me, T. J. Maxx would be a 45 minute drive one way. I use Metro thread, Embrilliance Essentials Software, and the project was sewn with my Brother PE-770 embroidery machine. On with the tutorial…
Since this is an applique project I need to select fabric for my design along with the matching embroidery thread (I use Metro thread). I was shopping at Hancock Fabrics the other day and came across these yummy fabrics. I have no idea what the name of these fabrics are, but I know I love them!


First I need to prepare my fabric for cutting on my Silhouette Portrait machine (travel sized Silhouette Cameo cutting machine that fits beautifully on my embroidery table right beside my PE-770 embroidery machine). You will need to back your fabric with Heat n Bond Lite before you cut it. I order my Heat n Bond Lite from Amazon, but many fabric stores stock it also.
I cut my fabric to size with a rotary cutter, then cut a piece of Heat n Bond Lite (HBL) just slightly smaller than my fabric. I place the fabric on my ironing board right side down then place the HBL paper side UP (rough side down) on top of the fabric. It just takes a few seconds to adhere the HBL to the back of the fabric with an iron.


You can hand trim your applique pieces, but I will create Silhouette applique fabric cut files with my Embrilliance Essentials software. Since there is already a fantastic video on YouTube that fully explains how to save the .studio cut files within Embrilliance Essentials embroidery software (you can find that here: https://www.youtube.com/watch?v=Jxcx1s19E7o) there’s no sense in recreating the wheel. Follow Terri Johnson’s instructions in her video then open the cut file in Silhouette Studio software. Below is an example of what my cut file looks like in Silhouette Design Studio software.

Next I will send my cut file to my Silhouette Portrait cutting machine and cut out the fabric applique piece. For this application I place my fabric on the mat right side up (I leave the paper on the back when I cut – you don’t have to – I think I get a better cut if I do – don’t do this if you have a brand new mat, the paper will be VERY difficult to remove). When using a Silhouette Portrait, make sure you load the mat with the “LOAD MAT” button. The “load mat” button is the top button that has an icon of a grid mat on it. I selected the “light fabric” cut setting (blade depth of 2) and sent the cut file to my Portrait machine.

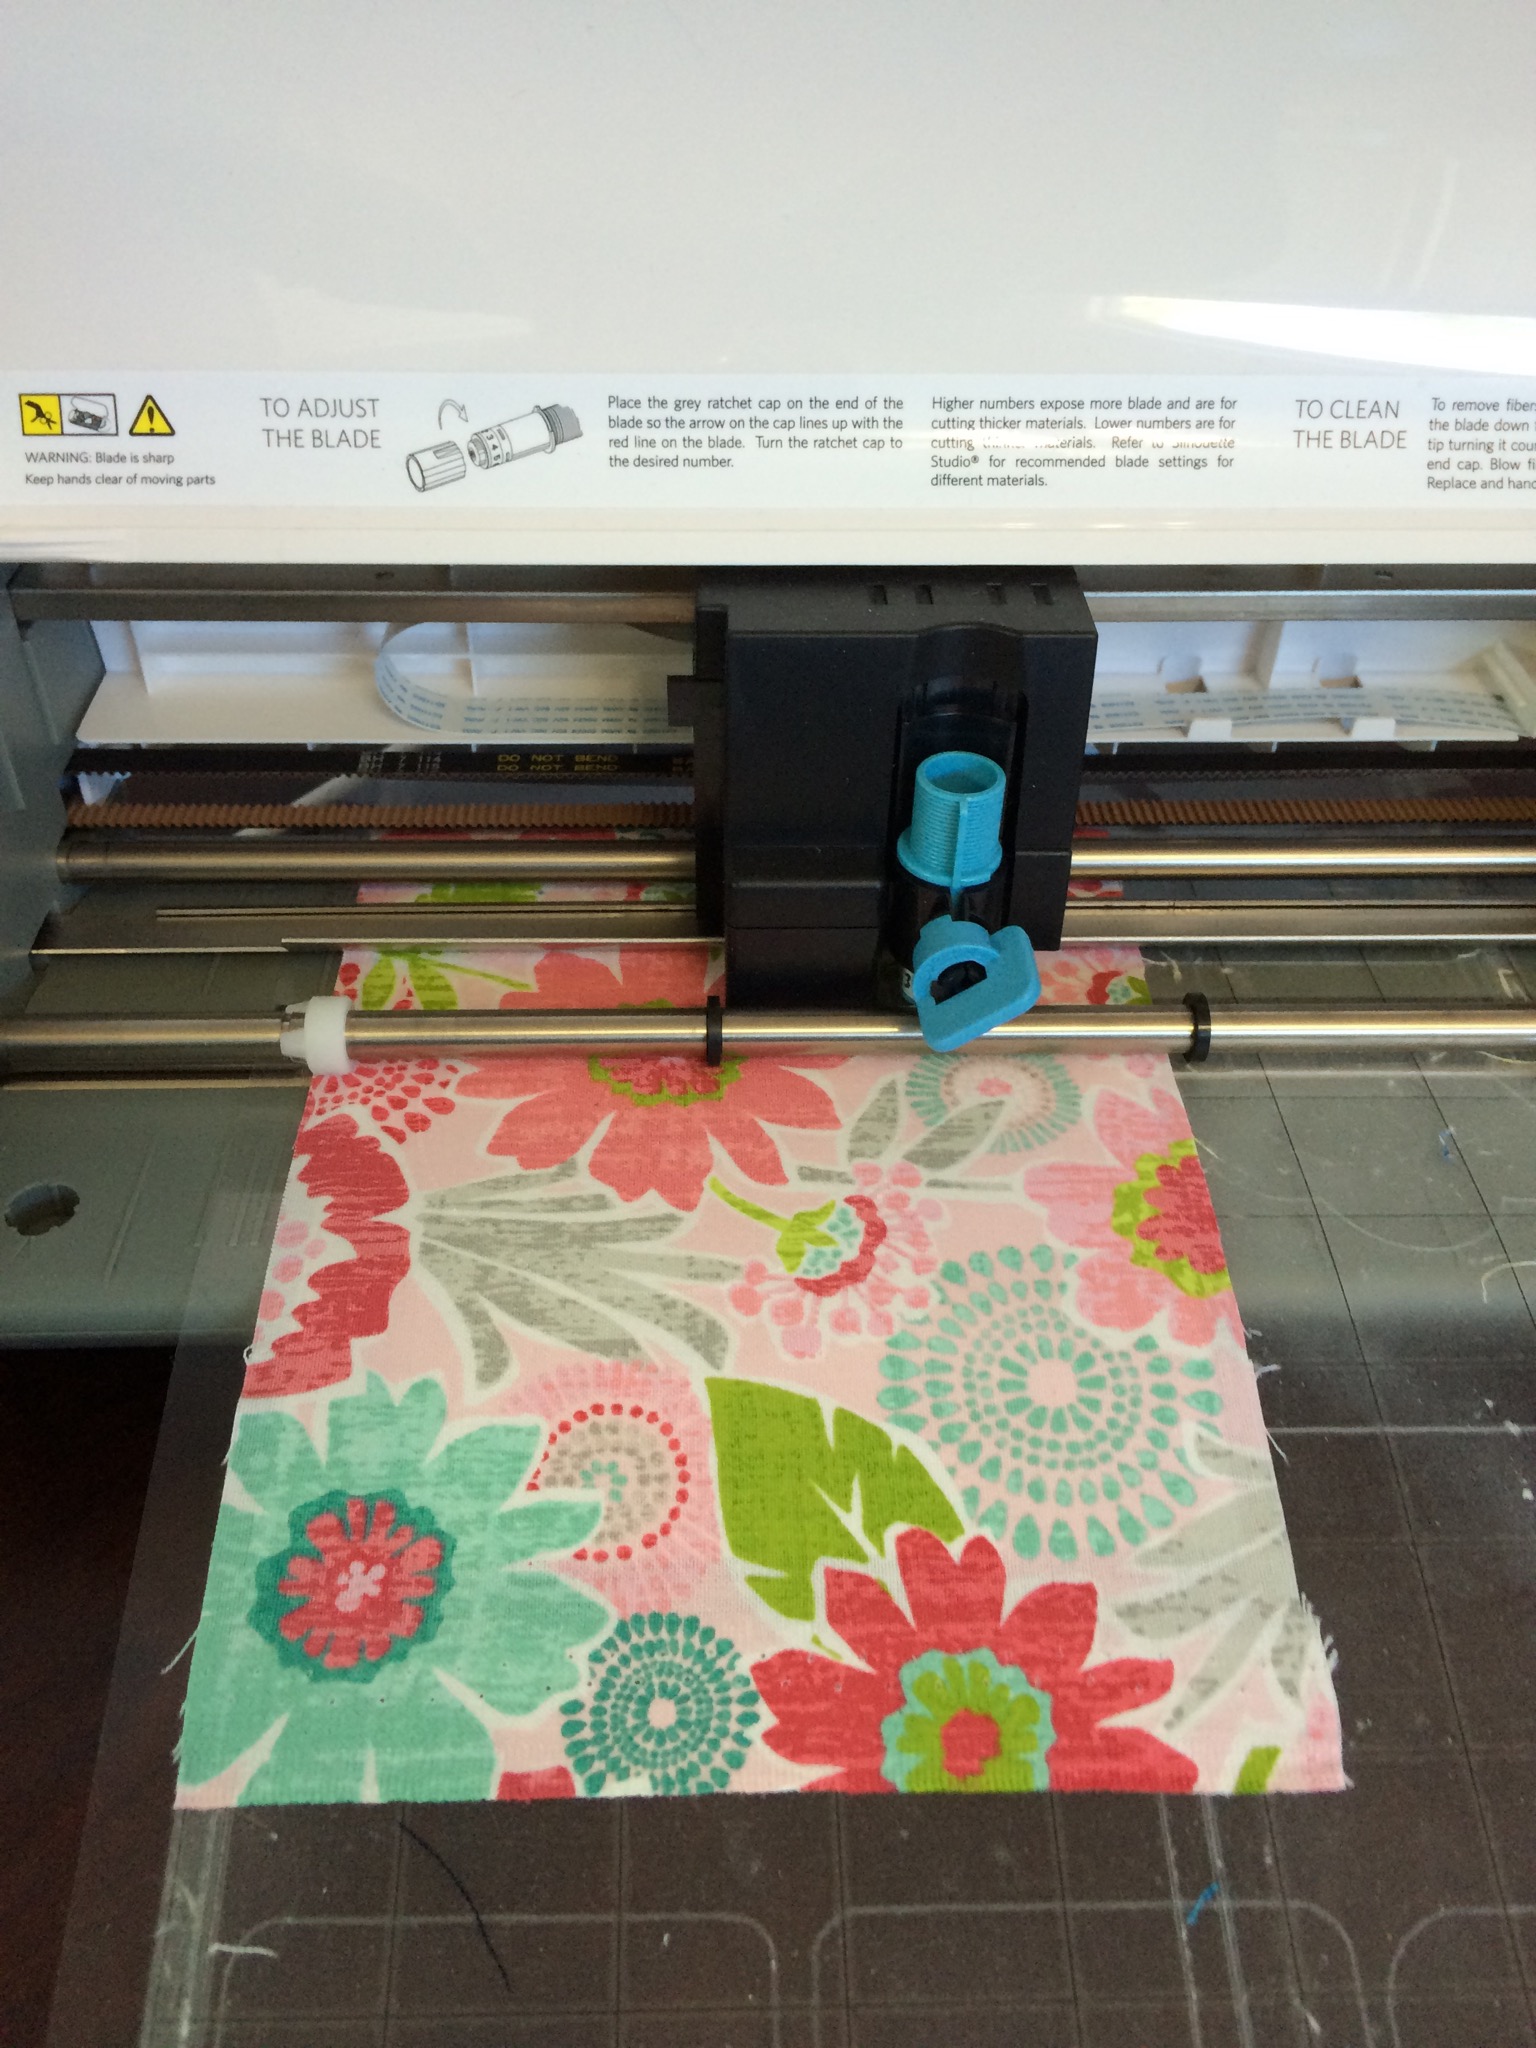
The fabric peels right off the mat – voila – perfectly cut applique piece. Be SURE to take the paper backing sheet off your cut applique piece at this point. You don’t want to sew the paper into your design (between the fabric and your towel).

Next it’s time to hoop the towel that I’m planning to applique. I start by pressing a center line down the entire length of the project. First I fold the towel in half (long-wise – right sides together) and press using heavy steam. This provides the horizontal centering line for the design. Next, we need to create a vertical centering line. My design measures approximately 5″ in height, so I know I want half of that (2.5″) above my vertical centering line and half below. I also like to leave 1″ between the top of the towel band and the bottom of my design, so I folded up the bottom of the towel (right sides together) and pressed the horizontal centering line at 3.5″.

Next I hoop medium weight tear away stabilizer in my 5×7 hoop and draw horizontal and vertical centering lines on the stabilizer with my Frixion Erasable Gel Pen (http://www.joann.com/pilot-frixion-ball-erasable-gel-pens-open-stock-red/12200028.html).

Next I spray my stabilizer with a temporary adhesive. I use Sulky KK2000.

I use the centering lines drawn on my stabilizer and the pressed lines in my towel to help me center my towel on the hoop. First line up the fold with the drawn centering line, then unfold the towel (not shown) and match the opposite pressing line with the drawn centering line. The goal is to have the intersection point of the pressing lines in the same location as the intersection point of the drawn lines. Then I attach the hoop to my embroidery machine. This hooping process is called “floating.”


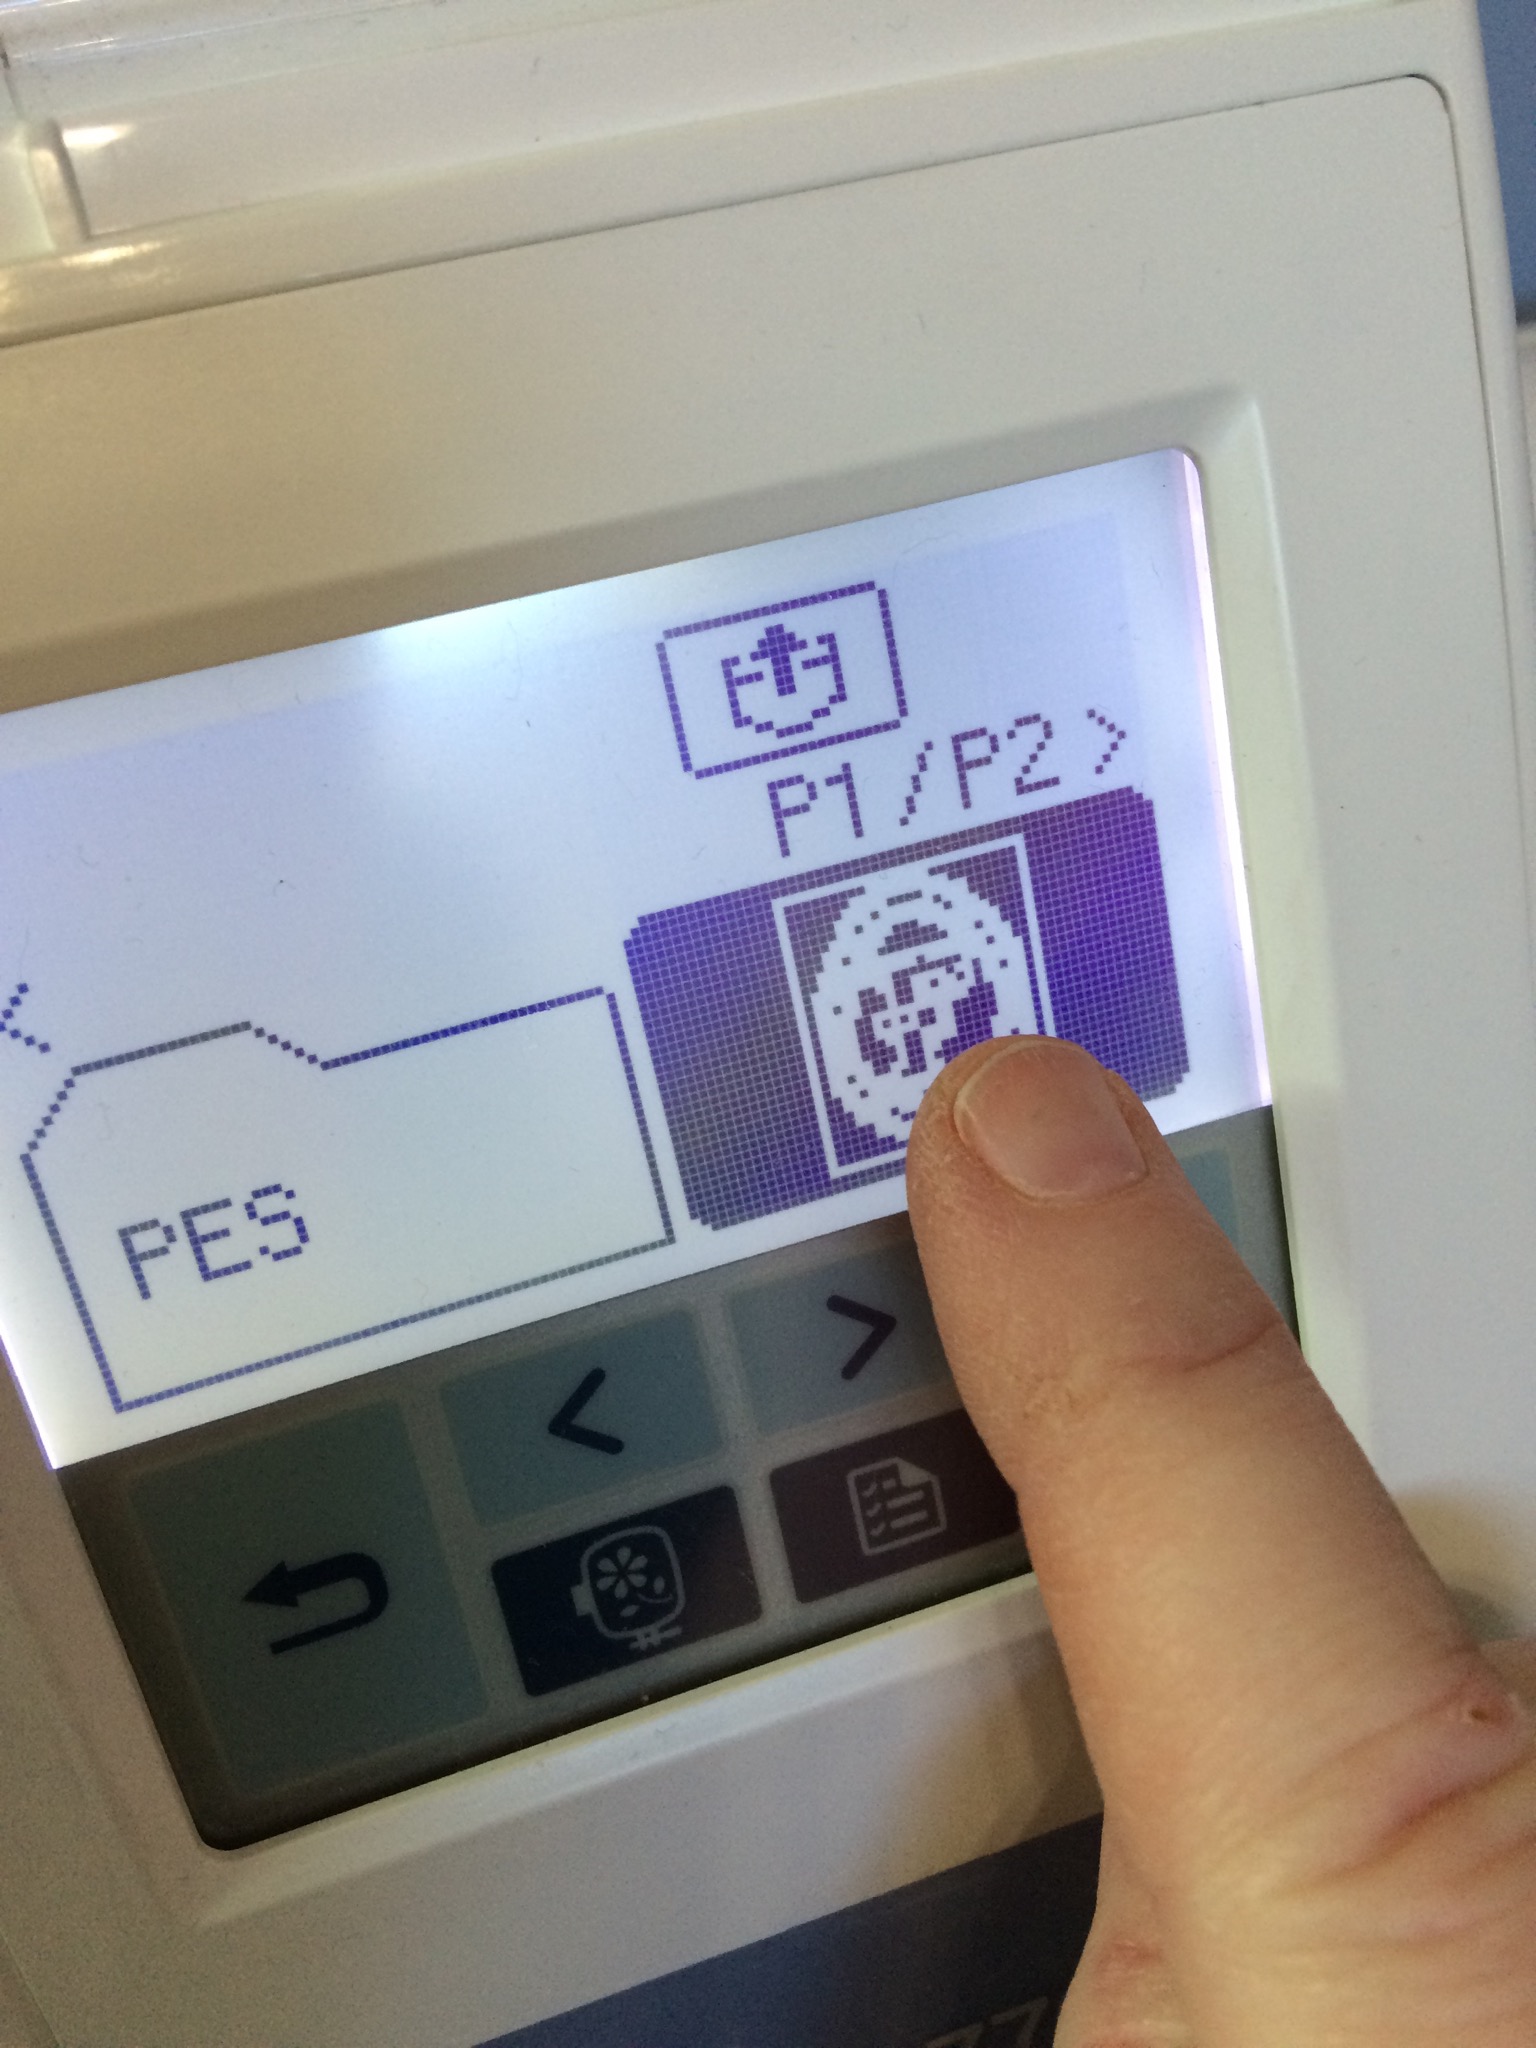
This is the control panel on my Brother PE-770 embroidery machine. I have already saved the design I want to sew-out from my computer to my flash drive. I’ve plugged my flash drive into the side of my machine. By touching this icon, I’m telling the machine I want to sew a design that is located on my flash drive. If you have a different machine, your control panel will likely look different, but there will be options to do the same steps – they may just look different.

Next I need to tell my machine WHICH design on my flash drive I want to sew. Scroll left or right until you see the design you want to sew out on the screen. Touch the design you want to sew.
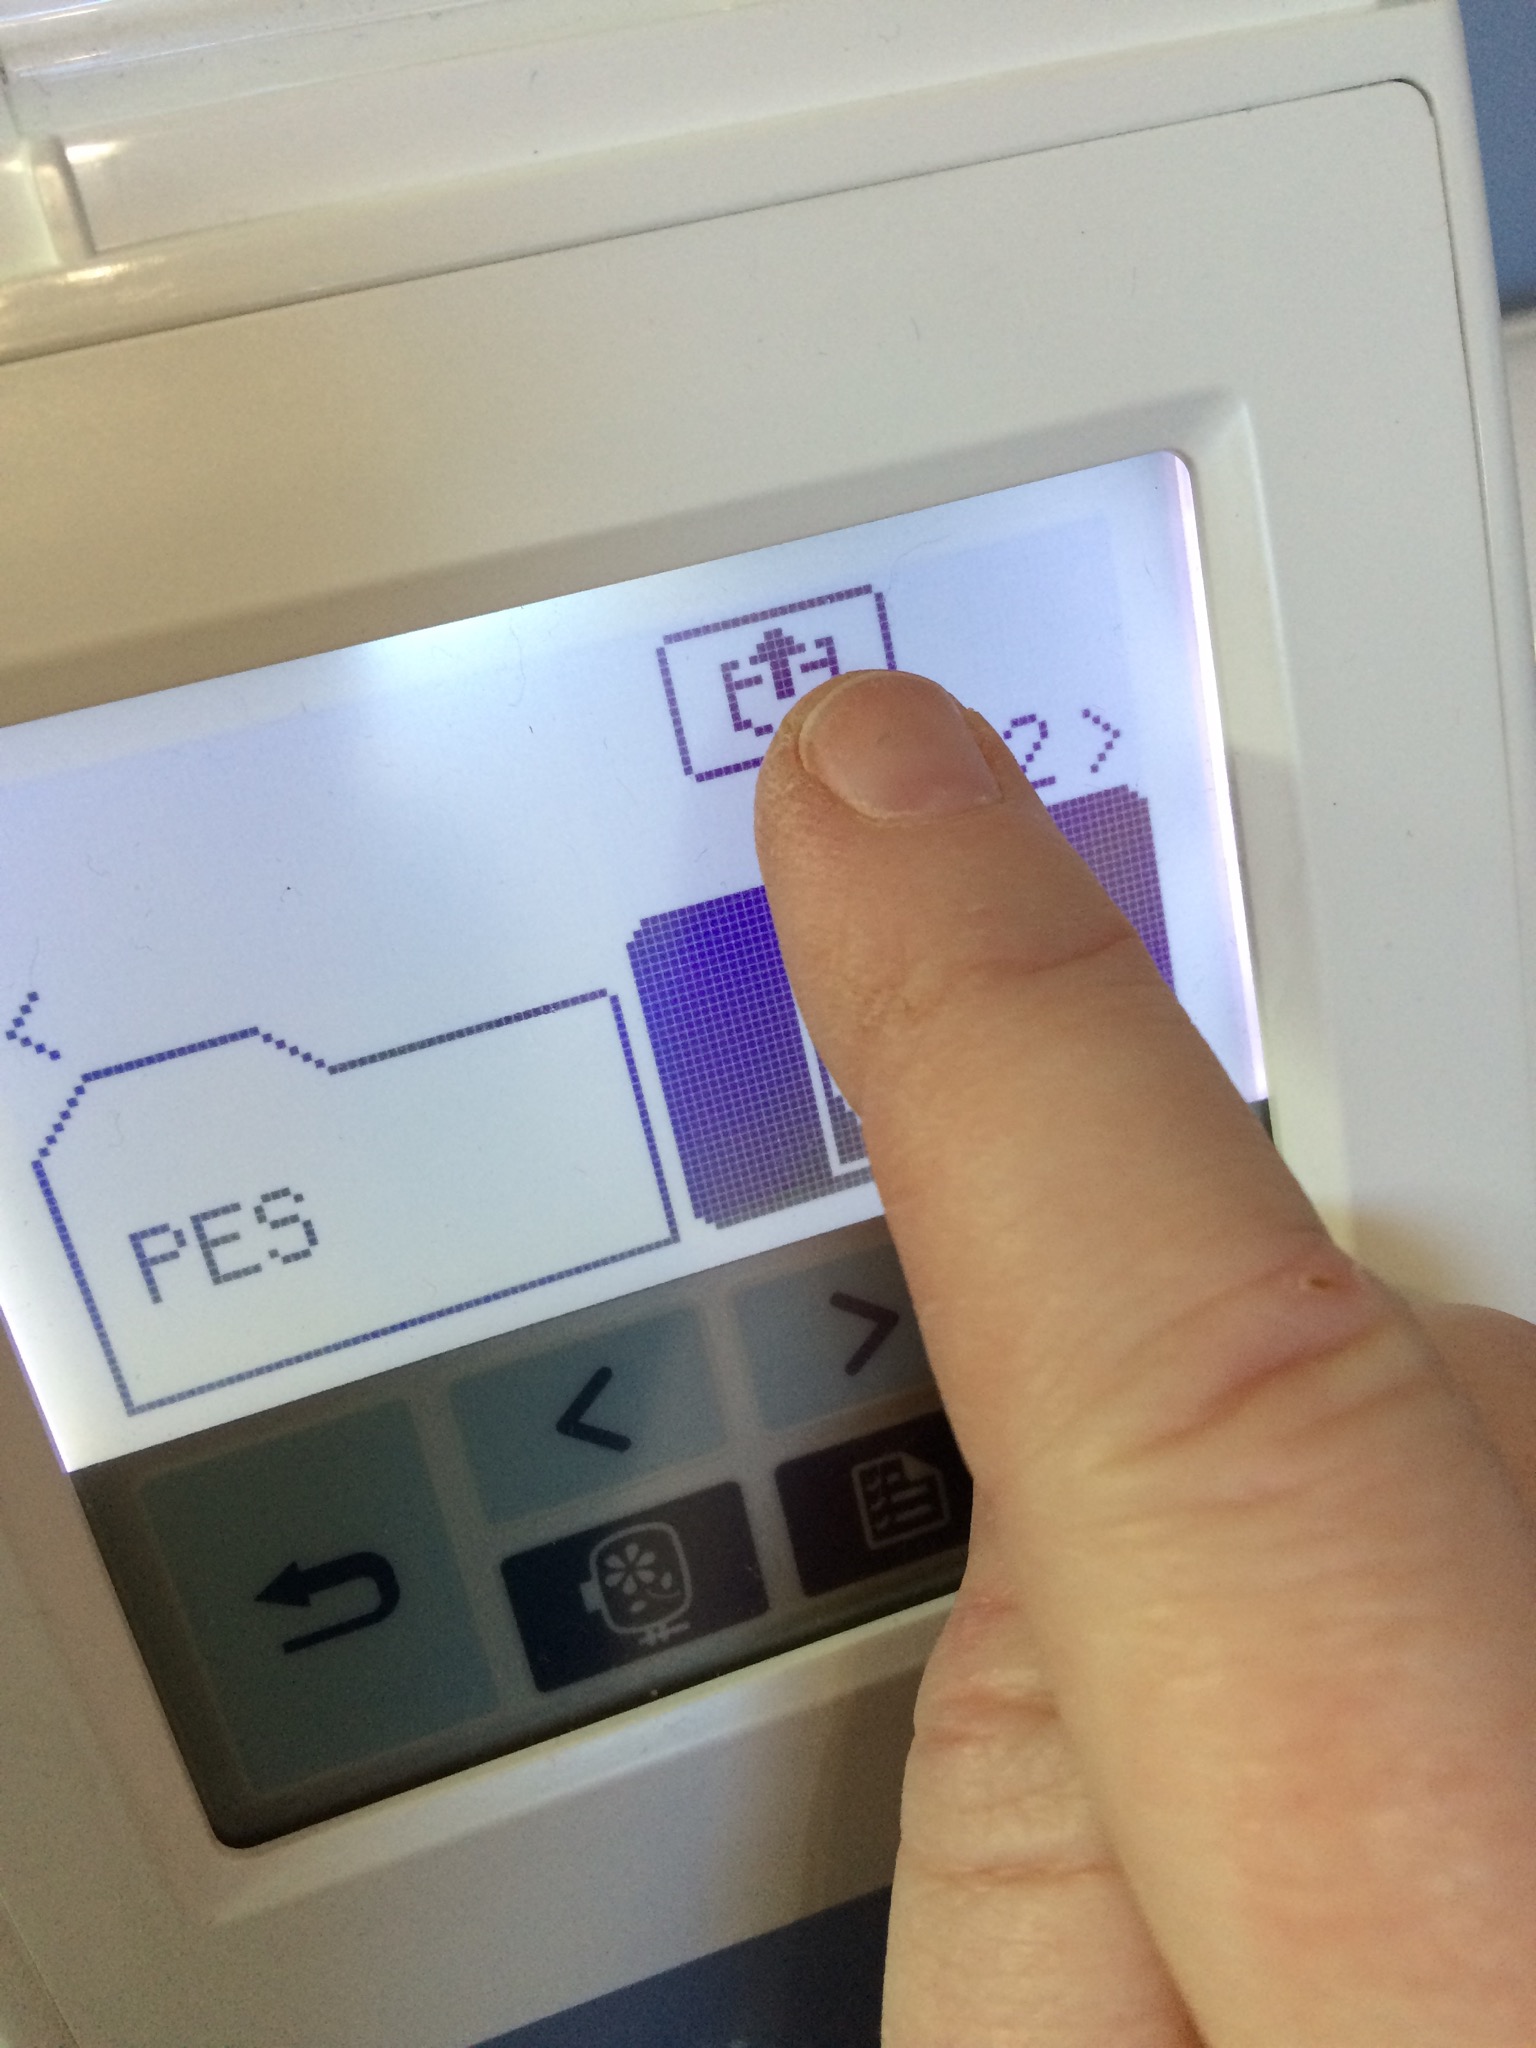
Next you have to send the design from the flash drive to the machine – touch the
“upload” icon to send your selected design to the machine.
The hoop will do some shifting around, and will likely land in a place that isn’t at the center of your design. You need to tell the machine where the center of your design is. The pressed centering lines are easier to see than it appears in this photo. The goal is to center your needle hole at the very center of where the pressed centering lines intersect. Lining up the center of your project (the intersecting point of the pressing lines) with the center of the needle hole tells the machine where you want the center of your embroidered design to be.

To tell the machine where the center of your design is, choose “ADJUST” on the control panel.

Then choose “LAY-OUT”

Touch the arrows to move your hoop left or right and up or down to get your needle to fall exactly in the center of those intersecting pressing lines on your hooped project.

When embroidering a project that has a loft to it like a terry/plush towel, you need to use some sort of “topper” to keep the thread from sinking into the loft of the fabric. Most people use a product that disappears with water, I prefer Heat N Gone for towels. Heat N Gone disappears with the heat of a regular household iron. You can also use a water soluble stabilizer rather than Heat N Gone– both accomplish the same thing – I just prefer Heat N Gone.

Now that I’ve centered my needle with the pressed intersection center point on my towel and have my Heat N Gone in place it’s time to push “GO!!” I almost always use a basting stitch (unless it would make holes in my project that would be seen later – like leather purses or some canvas tote bags). I use a basting stitch file that I merge into my design as the first “stop.” I got my basting stitch files from Embroidery Garden and they were FREE! You can get those here:
http://www.embroiderygarden.com/shop/free-designs-projects/basting-files-basj65.html

Since this is an applique design, the first thing that will sew out are your “position” stitches. These stitches show you the exact placement of your fabric pieces. I deviate a little from the instructions that Terri Johnson gives in her saving .studio cut file video. Terri recommends that you increase the size of the position placement lines by 1mm before you save your cut files. I don’t do that because I find it hard to center the fabric over the position stitches if the fabric piece is bigger than the placement outline. I usually save the cut files at exactly the size of the position placement file, then I know that my fabric should fit exactly within the placement lines. The down side to this is that the fabric tack-down stitches often don’t stitch on top of the fabric because the fabric isn’t wide enough. I use a good layer of temporary adhesive spray (KK2000) on the back of my applique pieces to hold them down. When you get to the final satin stitches, you will find that they are plenty wide enough to cover the edges of the fabric pieces, it’s only the tack-down stitches that typically don’t “catch” the applique fabric
If you don’t have a cutting machine to cut your applique pieces – you just sew out your position placement, then lay your fabric piece down on top of the stitches (right side up). Sew out the tack-down stitches. Remove your hoop from your machine (DO NOT remove the project from the hoop), use a sharp, pointy scissors to trim your fabric pieces close to the tack down line, and place your hoop back on the machine.

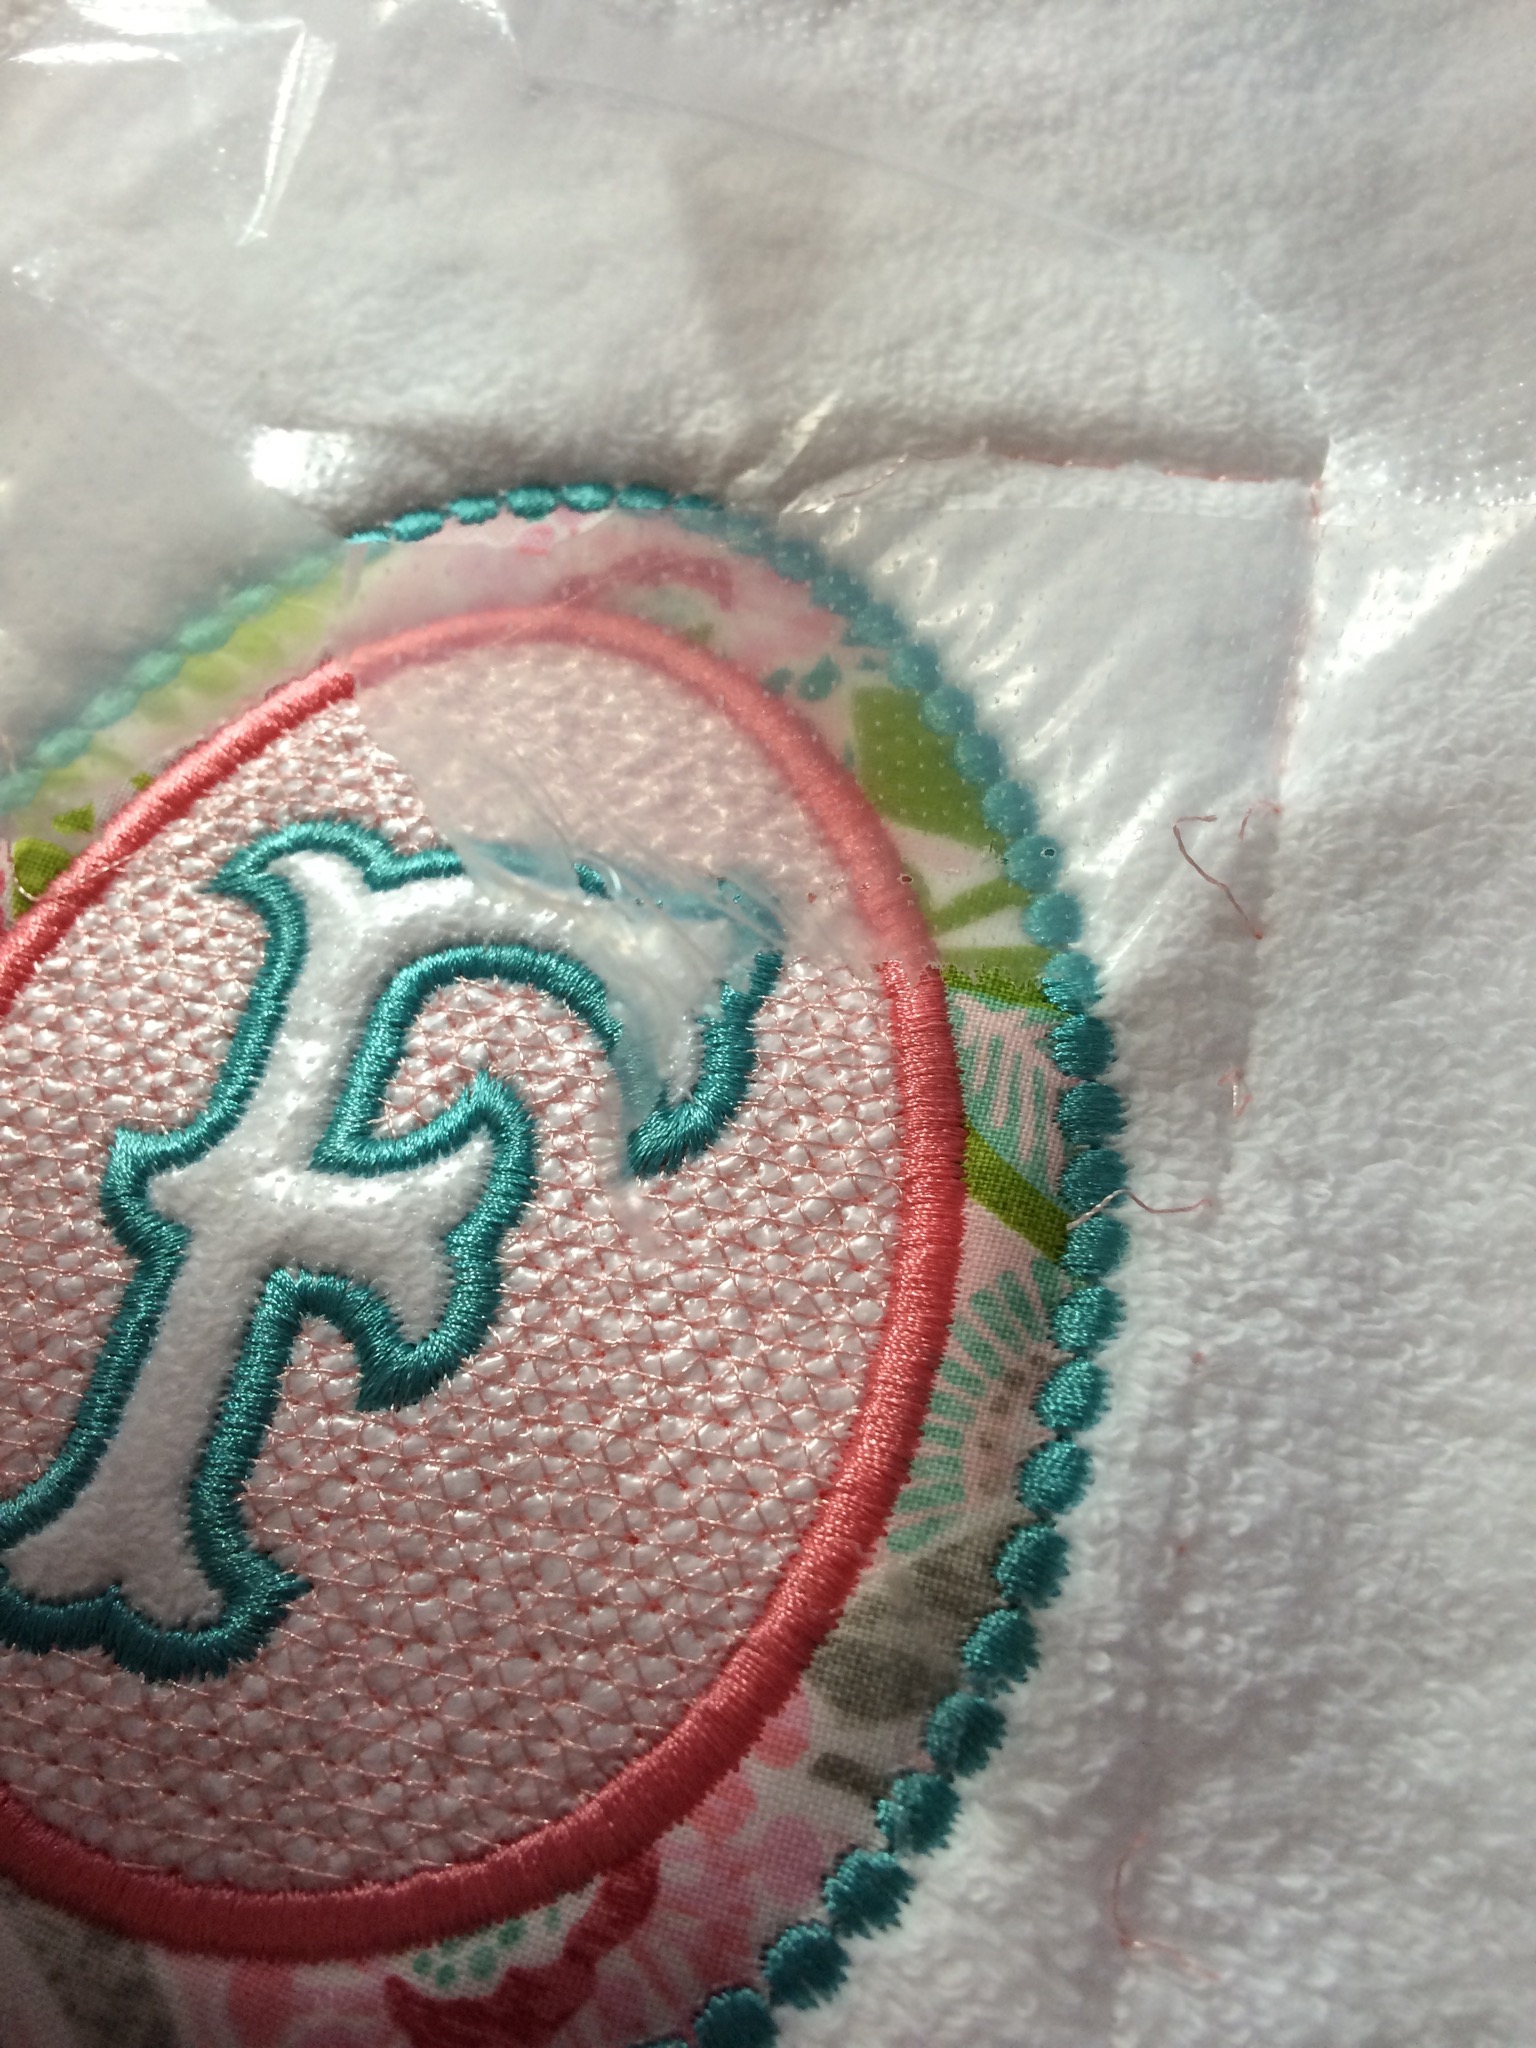
Here you can see the final satin stitch is plenty wide to catch the cut applique fabric.

And you can see that the outer dotted applique finishing stitches also were wide enough to catch the fabric edge around the entire outside edge.

The stitching is now complete. Time to remove the basting stitches and the Heat N Gone topper. Remove the hoop from the machine. Take a seam ripper and cut the basting stitches every 3-4 stitches all the way around then simply pull up the Heat N Gone – it should just peel right up. I try to remove as much as possible before using a warm iron to remove the remaining small pieces.
Next I remove the tearaway stabilizer from the back.

Lastly I press the towel to remove the centering lines and any remaining Heat N Gone. And you are done! SUPER easy. This project took me about 20 minutes from the time I downloaded the design file to the time I completed the final pressing.
Here’s the final product.


Fabulous tutorial – I will definitely refer to this again!
LikeLike
Oh, Susan!! Thank you so much for doing this tutorial! I haven’t tried towels yet and this is perfect. Thank you also for the link to the video for saving a cut file! I was wondering how you did that! This is so helpful and I really appreciate the time you took to do this!
LikeLike
Thank you for this. I’m a new follower and a new embroiderer. I adore Embrilliance. I have two questions: What machine are you using? And Have you joined designs to make larger ones?
LikeLike
Hi Lis! At the time I wrote that blog post I had a Brother PE770 machine. In December 2015 I bought a used Brother Quattro 2 machine. I upgraded to a different machine because the Quattro two offers a 8 x 12 hoop size. I have put words and designs together or even two designs to create different designs. When I had my PE 770 I owned a multi-position but I never used it.
LikeLike
When you bought your new machine, did you sell your 770? I’m curious as to what I might expect to get for mine. It’s only a few months old.
LikeLike
I sold mine to a friend for $300. There were no extras included in that other than the items that came with the machine.
LikeLike